
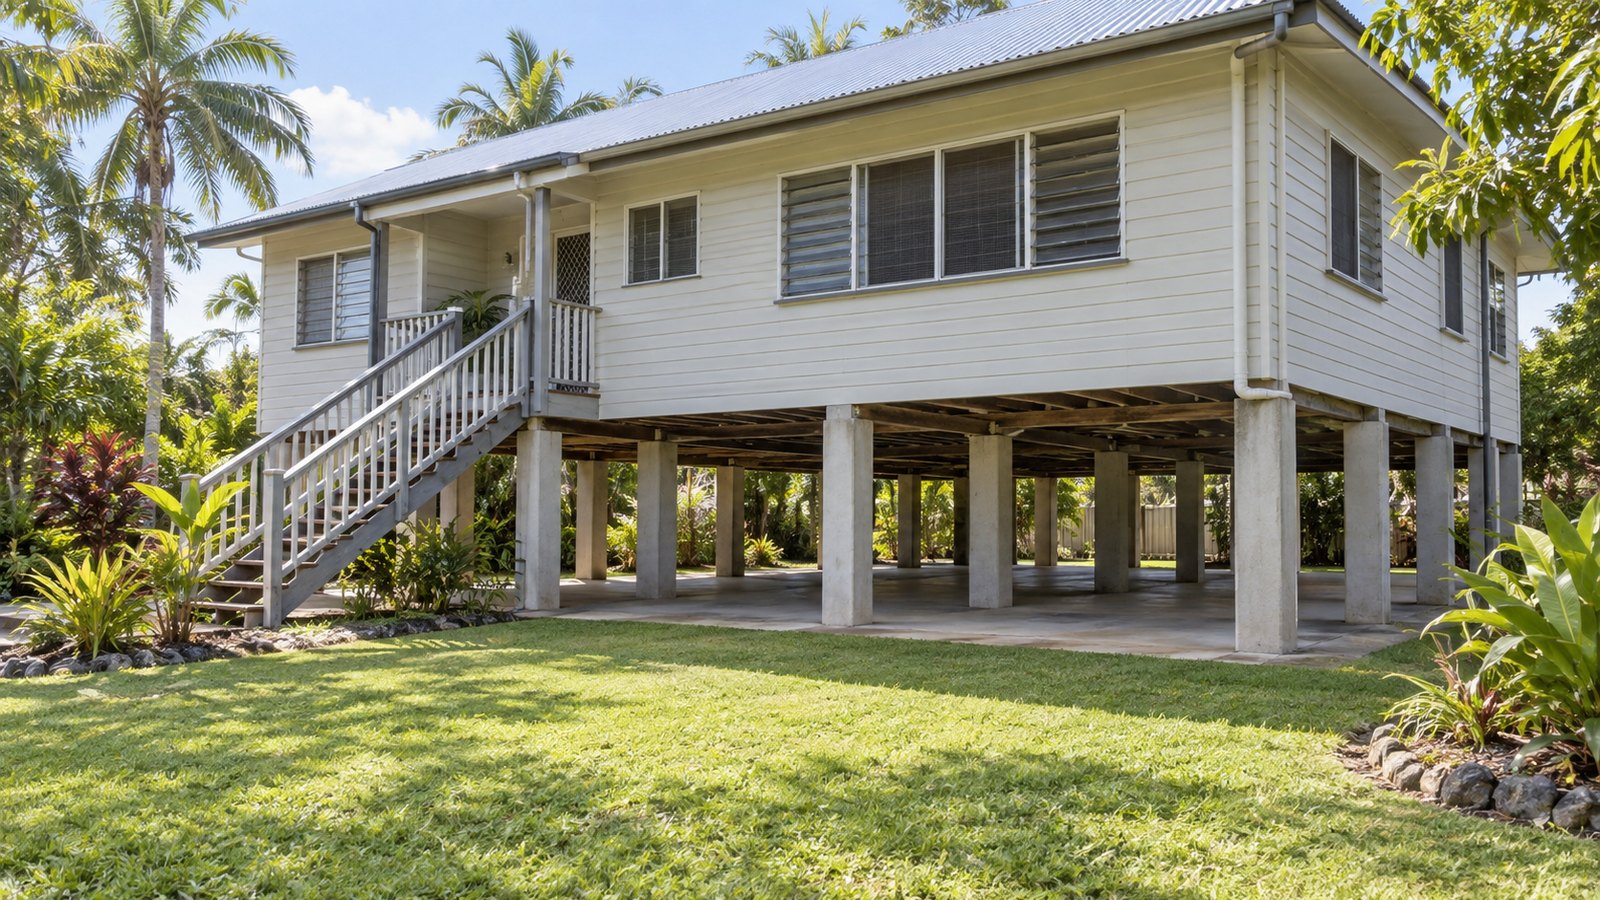
Describe the underfloor space as it is now
An elevated home can look easy to inspect from the street while its underfloor area is partly enclosed, crowded with storage or interrupted by later building work. Start with the current layout. Identify open areas, enclosed rooms, stairs, cupboards and any section where the ground rises towards the floor. Give the inspector a simple plan or photographs taken from safe standing positions. The useful question is which parts can actually be examined, not whether the house is generally described as high-set.
Tell the provider which parts are used for parking, storage, laundry or another purpose. A parked vehicle, fixed workbench or full-height cabinet may affect access to a different area from the one you expected. Do not empty everything before asking what preparation would help. A targeted access plan can avoid unnecessary lifting while making the important locations available. If you cannot move an item safely, identify it beforehand and ask how the inspection scope will account for it.
Include later changes even when they were made before you owned the property. An added room, a new stair, replacement plumbing or a concrete floor beneath part of the house may have changed the visible arrangement. Describe the evidence you have and mark uncertain dates as uncertain. The inspector should assess the property in front of them, with the history as supporting information. A photograph of the original open undercroft does not establish what can be seen after years of alterations.
Separate physical access from a clear view of the building
Being able to walk beneath the house does not mean every relevant surface is visible. Lining, insulation, ducts, cupboards and stored belongings can obstruct the view from an otherwise spacious area. Ask the inspector to explain the distinction between a route they can use and the surfaces they can examine from it. That conversation helps you understand why a report might record a limitation even though the underfloor area has ordinary standing room.
Point out changes in floor level and any tight sections without entering them yourself. A space can narrow behind a beam, beside a water tank or towards a sloping part of the site. Do not crawl into an unfamiliar area to photograph the far end. Provide the observations you can make safely and let the provider decide what access and equipment are appropriate. If a separate trade needs to create an opening, agree the scope and responsibility before anything is cut or removed.
Check how the area is reached. A side gate may be the only practical entrance when vehicles are parked beneath the house. Stairs and an internal doorway may not provide the route needed for the inspection. Tell the provider about locks, pets and anything that restricts movement around the perimeter. A successful appointment depends on reaching the agreed area safely as well as having it reasonably clear once the person arrives.
Identify the existing termite-management arrangement from records
Find any termite-management notice, installation paperwork, site plan and recent inspection reports. An elevated construction style does not identify the entire protection arrangement. Ask the pest professional to explain the components relevant to your house and how they are intended to be inspected. A visible piece of metal, a concrete pier or a treated area should not be taken as proof that every possible route or building component is covered.
The Northern Territory Government's termite guidance describes different management systems and stresses maintenance and monitoring. Use the actual property records to ask what ongoing inspection involves here. Request an explanation of the areas that must remain visible, the access that must be retained and the signs or changes you should report. Do not substitute an internet diagram of a different construction system for that property-specific advice.
If the records and the visible building differ, record the discrepancy. For example, an earlier plan may show an open side where a room now stands, or the latest report may mention an area that has since been lined. Ask whether the alteration needs further investigation and who should provide it. The purpose is to understand the current condition and inspection limits, rather than assuming either that the old system still functions unchanged or that everything must be replaced.
Treat moisture observations as information for the right trade
Tell the inspector about persistent dampness, a known plumbing leak or water that collects beneath the house. Identify the location and timing: after rain, during use of an upstairs bathroom, or continuously. These are useful observations, but they do not establish the cause of moisture or prove termite activity. If you have a plumber's report, supply it alongside the pest record. Keeping the two types of findings distinct helps each professional address the question within their scope.
Do not redirect drains, excavate around supports or alter the ground level merely to make an inspection area appear dry. Those changes can affect other building and drainage questions that need assessment. Ask the relevant professional to identify the cause and propose a suitable repair. The pest manager can then explain whether the proposed work affects termite-management components or access. A coordinated sequence is more useful than several small fixes undertaken without anyone understanding the whole arrangement.
Avoid covering a damp or damaged area with storage or a new lining before it has been assessed. If there is an immediate safety concern, keep the area unused and obtain appropriate advice. Necessary safety work should not wait for a routine inspection date, but tell the people involved about the pest question so useful evidence can be recorded where safe. The aim is to resolve the condition while retaining a clear account of what was found and changed.
Keep storage practical without concealing the inspection route
Ask the inspector to identify the space that should remain accessible in the underfloor area. Then plan storage around that advice. A row of movable containers may be easier to manage than a fixed cupboard placed across a location that needs regular examination. Consider how the storage will actually be moved on inspection day, including its weight and the room available to place it elsewhere. A theoretically removable unit is less useful if it can only be shifted with a specialist team.
Store household items so they can be identified and handled safely. Do not build makeshift platforms against supports or attach shelving to structural members without appropriate advice. The pest inspection does not authorise alterations to the building. If you want permanent cabinetry or a workshop fit-out beneath the house, include the agreed inspection access in the design brief. Ask the builder and pest provider to review the arrangement before installation closes off an area that is currently visible.
Keep a photograph of the access arrangement once the area is organised. It can help another household member prepare for the next visit and show a future provider where fixed items normally stand. Update it when storage or use changes. This is a simple maintenance aid, not proof that a particular clearance is adequate for every house. The useful information is the arrangement agreed for your property and the changes that have occurred since it was assessed.
Plan enclosure or conversion work before access disappears
An open underfloor area may be attractive for additional storage or another room, but enclosing it changes more than privacy and weather exposure. Ask the designer or builder about the building and approval requirements for the proposed use, and involve the pest professional in the access and termite-management questions. Do not infer that an area is suitable for conversion because the existing height seems convenient or a neighbouring house has enclosed its lower level.
Show the proposed walls, doors, cabinetry and services on the same drawing. Ask which existing components will become concealed and how they will be managed afterwards. If an inspection or protection detail must be completed before lining, put that point in the construction programme. The person installing the lining should know who can confirm the preceding work is complete. Photographing a finished room cannot recover information that was available only while its framing or junctions were exposed.
Keep the inspection limitations in the handover. A newly enclosed area may still include concealed spaces that cannot be examined in an ordinary visit. Ask what access panels or other provisions are part of the agreed design and how they should be used. Do not remove fixed lining later without the appropriate assessment. A useful renovation record tells the next owner or inspector what was built and where access remains possible, instead of suggesting that a new finish has removed every future inspection question.
A worked example: parking and storage below a partly enclosed house
Hypothetical example: a homeowner books an inspection for an elevated house with parking under the front and a storage room beneath the rear. The booking includes photographs of both areas and identifies a locked cupboard against one side. The provider asks for the vehicle to be moved and the ordinary access route to be cleared. The fixed room lining remains a separate limitation, so the owner is not told to dismantle it as routine preparation.
At the visit, the inspector records which areas were accessible and explains a recommendation for further assessment near a known leak. The homeowner coordinates that recommendation with the plumber's work rather than assuming that fixing the pipe completes the pest assessment. When the work is finished, the reports and photographs identify what changed and what remains concealed. Storage is returned only to the arrangement agreed for future access.
The lesson is about scope and sequence. An elevated house is neither automatically easy to inspect nor automatically a problem because part of it is enclosed. Its current layout, records and condition determine the useful next step. A clear plan lets the homeowner prepare the right area and lets the provider state the limits of the inspection without turning an ordinary booking into uncontrolled demolition or unsafe exploration.
Leave the visit with an access plan you can use again
Before the inspector leaves, ask them to point out the areas that need to stay clear and explain any recommended follow-up. Confirm whether the report covers the whole dwelling within its stated scope or whether a particular part needs a return visit. Record who will arrange access, which other trade may be required and the timing recommended. A finding is easier to act on when it has a location and a next action rather than a broad note to improve access.
Keep that plan with the property records and review it after changing storage, plumbing or the use of the lower level. Your next enquiry can then identify what has changed since the previous inspection. The brief below helps assemble the suburb, underfloor layout, known moisture observations, available records and access constraints. It supports a conversation with the provider while keeping the homeowner's preparation within ordinary safe observation and household organisation.